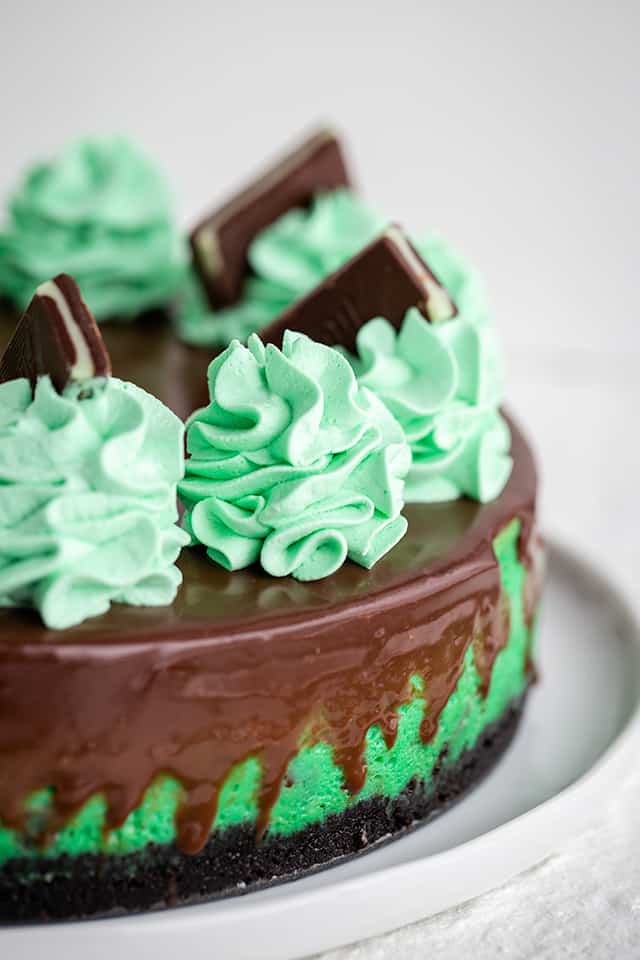
Mint Chocolate Cheesecake
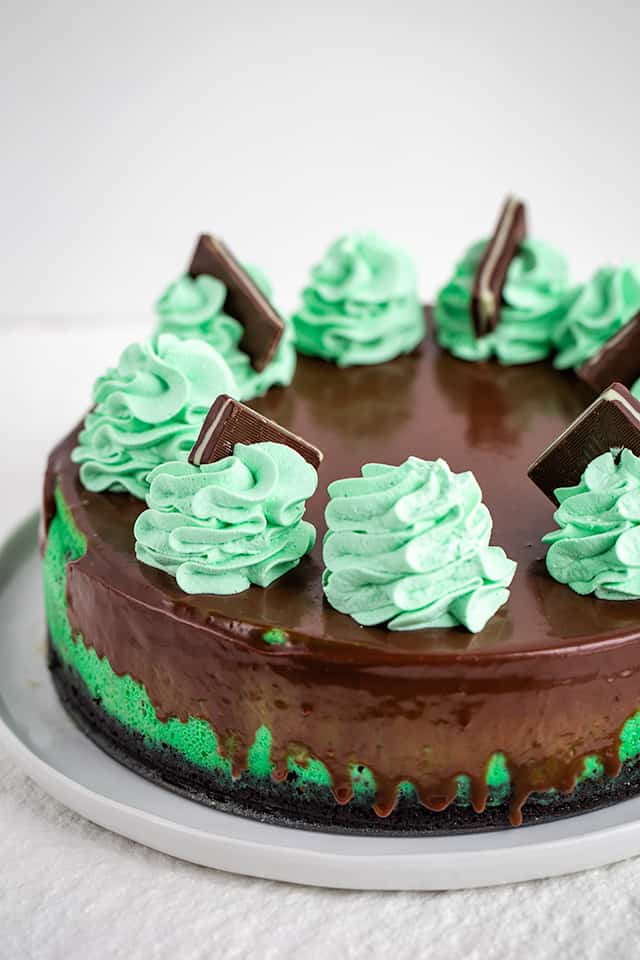
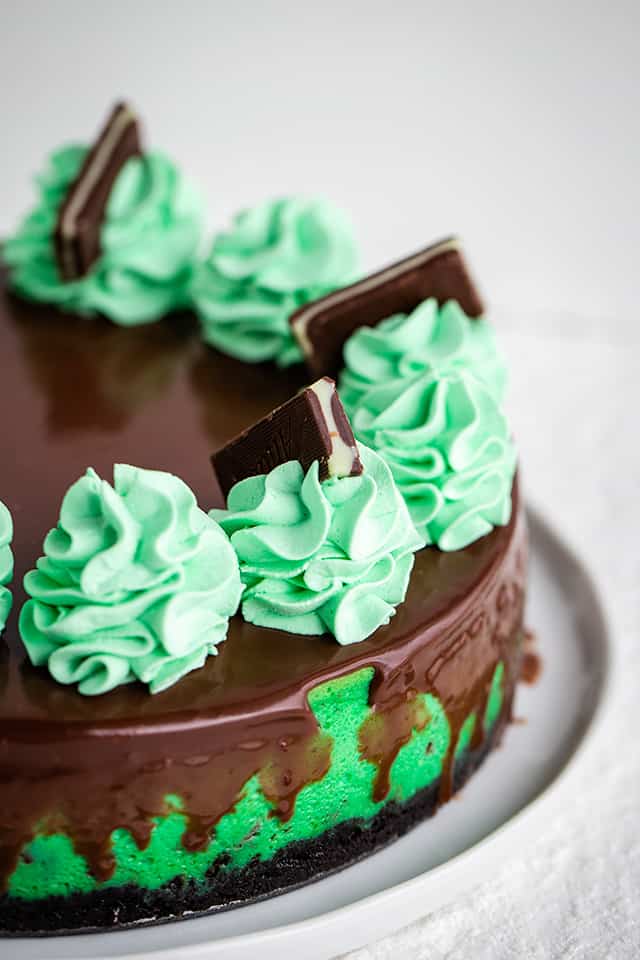
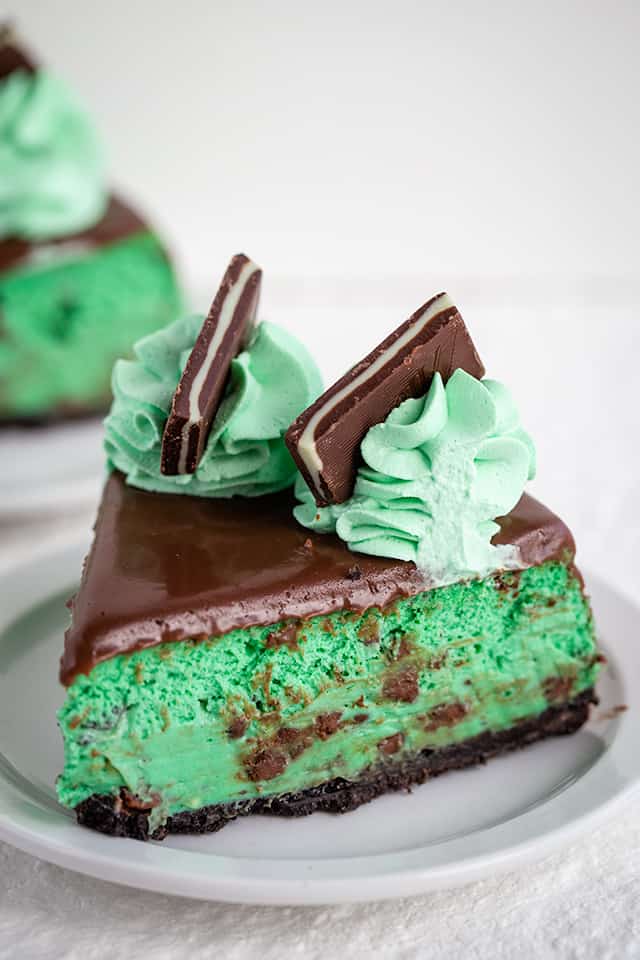
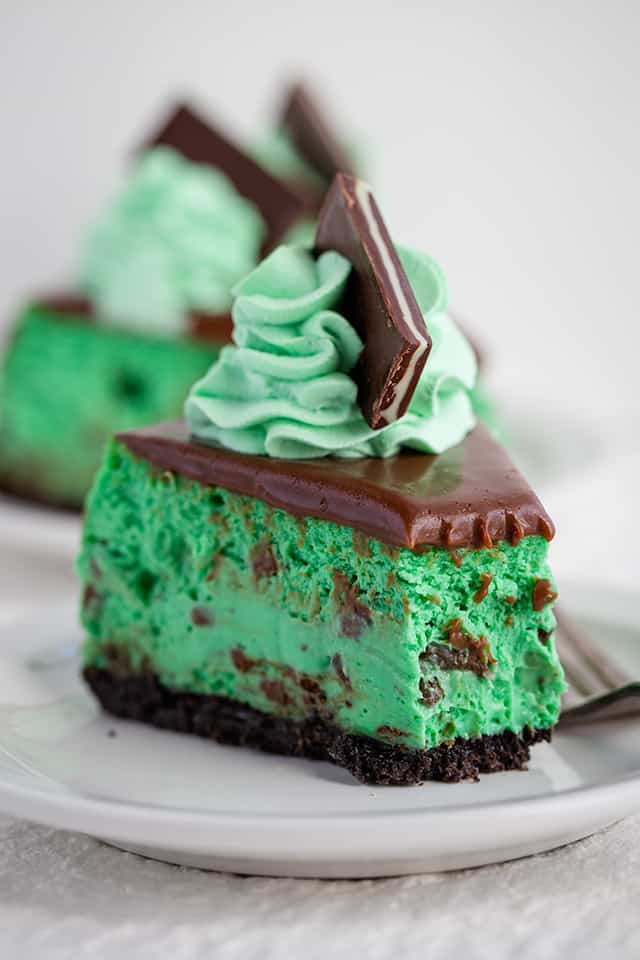
This vibrant colored Mint Chocolate Cheesecake is great for any chocolate mint lover. It has a mint chocolate Oreo crust, and a green mint cheesecake filling with bits of milk chocolate folded into it. It's the perfect St. Patrick's Day cheesecake!
Do you know someone who's crazy for a mint chocolate dessert? Both my son and husband are crazy about the combination. If so, there's also a Mint Chocolate Layer Dessert, Mint Cheesecake Brownies, and these Mint Chocolate Pudding Cookies on the blog as well.
As I was testing this recipe, on the first try, I added a little bit too much mint extract. Okay, it was WAY too much. By the time my husband got to the piece of candy that was on top of the mint whipped cream, he couldn't taste a thing. He said to me, "This tastes off." I was like could it be the intense mint flavor that's saturating your taste buds and making everything else taste off?
Mint Chocolate Cheesecake Ingredients
To get started with how to make a mint chocolate cheesecake, let's make sure you have the ingredients that are needed.
- Oreo Cookies - Use the original Oreo cookies with the mint Oreo cookies and leave the filling inside. You could also use just one kind of Oreo cookie instead of buying both kinds.
- butter - You can use salted or unsalted. I went with salted because that's what
- cream cheese - Use full-fat cream cheese and make sure it's softened.
- granulated sugar - don't substitute this with brown sugar or powdered sugar.
- vanilla extract - Use your favorite pure vanilla extract or homemade vanilla extract
- mint extract - You can use peppermint extract in a pinch.
- large eggs - Always use large eggs for my recipes unless another size is specified.
- sour cream - full-fat sour cream is a must!
- heavy cream - Heavy whipping cream provides some liquid to make the cheesecake creamy, but is still thick. Buttermilk can be used as a substitute but will provide extra tanginess.
- milk chocolate bars - I opted for milk chocolate bars but mini chocolate chips or Andes Creme De Menthe baking chips will also work.
- green gel food color - Use gel since it adds more color with a lot less liquid being added.
The first 3 ingredients are for the mint chocolate oreo crust. If you don't mind buying both original oreos and mint oreos, I would, but it's not necessary. The original Oreos will taste amazing.
The remaining ingredients are for the mint chocolate cheesecake filling.
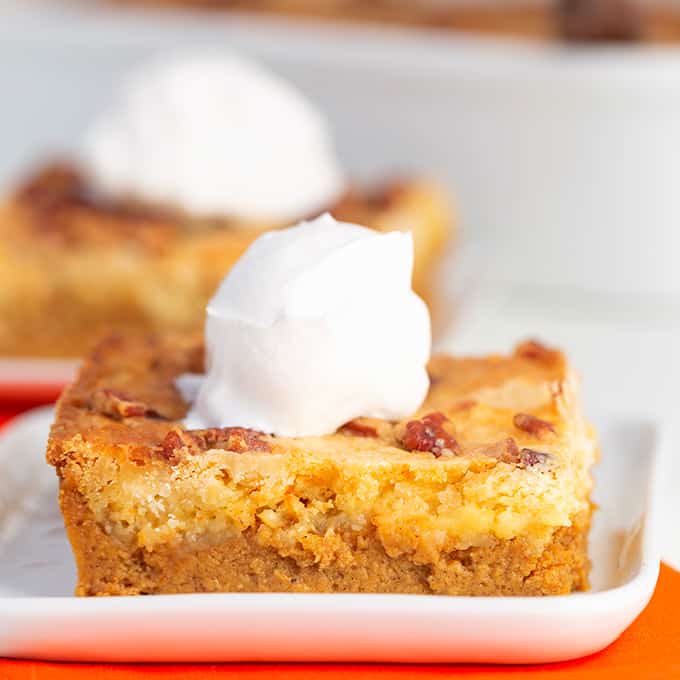
Discover what favorite pumpkin desserts should be at your Thanksgiving table this year
Mint Chocolate Oreo Crust
To make this mint chocolate oreo crust, you'll need both Original Oreos and Mint Oreos. If you don't want to buy both kinds of Oreos, just go for the originals. There's enough mint in the cheesecake filling to satisfy that minty craving.
Add the Oreos to a food processor to get a fine crumb. If you try to smash the cookies in a storage bag with a rolling pin, the cookie filling ends up just sticking to the bag and it becomes a huge pain in the behind.
Sometimes I get lazy and use my mini chopper instead of getting out my big food processor. I can't recommend a mini chopper to use, because mine all seem to break within the first 6 months.
Add melted butter to the crumb and pulse until the crumbs are coated with the butter. Sugar isn't needed for a cookie base crust. Then firmly press the crumbs into the bottom of the springform pan. Bake in a preheated oven for 10 to 13 minutes.
Mint Chocolate Cheesecake Filling
One of the most important things to remember when making a cheesecake is to have the cream cheese at room temperature. If you think it might still be slightly chilled, beat the cream cheese by itself with the hand mixer. Don't add anything other than the cream cheese, not even the sugar! Then mix until it's completely creamy.
Lumpy cheesecake is no joke.
Once there are lumps and you start adding any sort of ingredient that provides a liquid, you're stuck with the lumps.
Next up, add in the sugar and work that in with a hand mixer. Scrape the sides and bottom of the bowl. Add in the vanilla and mint extracts, and one egg at a time. Scrape bowl after adding the eggs. Add in the gel food color, sour cream, and heavy cream and mix until combined. Stir in the chopped candy bars, mini chocolate chips, or creme de menthe baking chips. I used chopped milk chocolate bars, but use whatever you prefer.
Spray down the sides of the pan with nonstick cooking spray and add the batter to the pan. This will keep the cheesecake from sticking to the sides of the springform pan.
Pop it in the oven and bake until done.
Mint Whipped Cream
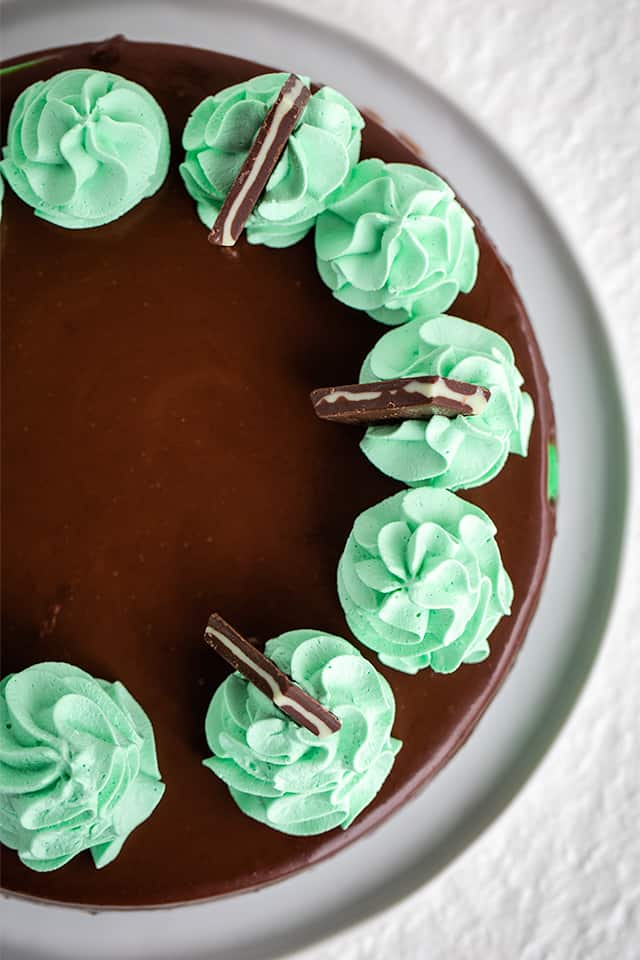
I really love how the green mint whipped cream looks on top of the ganache or with chocolate pudding like with these mint chocolate trifles. It gives a nice contrast and brings the cheesecake together. Although it wasn't the easiest to photograph.
To make the mint whipped cream, beat the heavy cream with a hand mixer until soft peaks form. Add in the powdered sugar, mint extract, and green gel food color and continue to beat until stiff peaks form.
Add the whipped cream to a piping bag fitted with a 1M piping tip and pipe swirls on top of the cheesecake. That's all it takes!
How to Store/Freeze Mint Chocolate Cheesecake
As with any cheesecake, you will need to store this cheesecake in an airtight container or wrapped in plastic wrap and in the refrigerator. It will last about 5 days when stored properly.
Cheesecake also freezes really well. To freeze the whole cheesecake, let it chill in the fridge overnight to set up. Remove it from the springform pan and tightly wrap it in plastic wrap.
You can then wrap it in an extra layer of plastic wrap and then in heavy duty tin foil or place it in a freezer container. It will last up to 3 months in the freezer. To thaw the cheesecake, place the cheesecake in the fridge overnight.
Frequently Asked Questions
I would recommend getting the mint extract otherwise you'll have peppermint cheesecake rather than mint. The mint extract has spearmint as well as peppermint in it to give it a different flavor than the peppermint extract.
Yes! You can use any chocolate chip or baking chip you want. I used Hershey's Milk Chocolate Candy bars for mine.
Yes! Since the only thing in this recipe that has gluten are the Oreo cookies, just grab the gluten-free Oreos as an substitute.
More Mint Chocolate Desserts
Mint Chocolate Cheesecake
Ingredients
Crust
- 14 oreo cookies
- 8 mint oreo cookies
- 4 tablespoons butter melted
Cheesecake Filling
- 24 ounces cream cheese room temperature
- 1 ¼ cups granulated sugar
- ½ teaspoon vanilla extract
- 1 teaspoon mint extract
- 4 large eggs
- 1 cup sour cream
- ½ cup heavy cream
- 6 Hershey's 1.55 ounce Milk Chocolate Candy Bars chopped
- 2 to 4 drops green gel food coloring
Ganache
- ¾ cup milk chocolate chips
- ½ cup heavy cream
Whipped Cream
- 1 cup heavy cream
- 2 tablespoons powdered sugar
- ¼ teaspoon mint extract
- 2 to 3 drops green gel food coloring
- Andes Chocolate Mints
Instructions
Crust
- Preheat oven to 325 degrees.
- Lightly spray the sides and bottom of a 9-inch springform pan with nonstick baking spray. Place a 3-inch wide strip of parchment paper against the sides of the pan.
- In a food processor, add in the oreo cookies. Pulse until the oreo cookies are a fine crumb.
- Add the melted butter into the oreo cookie crumbs and pulse a couple of times until the butter has coated all of the crumbs
- Dump the cookie crumbs into the prepared springform pan. Press the crumbs firmly and evenly into the bottom of the pan.
- Place the pan into the preheated oven and bake for 10 minutes. Remove from the oven and let cool while you work on the cheesecake filling.
Cheesecake Filling
- In a large mixing bowl, add in the cream cheese. Beat on medium until creamy. Scrape down the sides of the bowl.
- Add the sugar in with the cream cheese. Beat on medium until incorporated. Scrape down the sides of the bowl.
- Add the vanilla extract, mint extract, and the eggs one at a time into the cream cheese mixture. Beat until incorporated. Scrape down the sides of the bowl.
- Add in the sour cream, heavy cream, and green gel food color and beat until the food color is evenly distributed.
- Stir in the chopped chocolate until evenly distributed.
- Wrap the bottom of the springform pan with heavy tin foil. I always double wrap it to prevent leaking. Place the cheesecake into a slightly bigger pan and fill with 1 to 2 inches of hot water. Make sure the tin foil protects the cheesecake so water doesn't leak into it.
- Spray the sides of the springform pan with nonstick cooking spray.
- Pour the cheesecake batter on top of the oreo cookie crust.
- Place in the oven. Let the cheesecake bake for 1 hour 20 minutes to 1 hour 40 minutes or until done. To make sure the cheesecake is done, give it a wiggle. If it slightly jiggles in JUST the middle like jello, then it's done. If it jiggles all over, it needs to bake longer. Turn off the heat, open the oven door, and leave it ajar. Let the cheesecake cool in the oven.
- Place into the fridge and chill overnight until firm.
Ganache
- In a microwave-safe bowl, add in the chocolate chips and heavy cream. Microwave for 1 minute and stir until the heavy cream is incorporated. Microwave one more time for 30 seconds and stir until the ganache comes together and is smooth.
- Pour onto the cheesecake. Chill for at least 30 minutes. You can do this before it chills in the fridge for 4 hours or overnight as well.
Whipped Cream
- In a large mixing bowl, add in the heavy cream. Beat on medium until soft peaks form.
- Add in the powdered sugar, mint extract, and green gel food coloring and beat until stiff peaks form.
- Add the whipped cream in a piping bag fitted with the 1M tip.
- Pipe swirls on the top of the chilled cheesecake. Add the Andes chocolate mints on top of each swirl of whipped cream.
- Slice and serve! Store in the fridge.
Nutrition
(Nutrition facts are an estimate and not guaranteed to be accurate. Please see a registered dietitian for special diet advice.)

Very easy to make. I made a gluten free version and it was delicious. Definitely would make it again!!
So wonderful to hear!
The cheesecake tasted delicious but I had an issue where the batter was much more liquid-y than any other cheesecake I've ever baked (and I've made a lot). It baked just fine and tasted great, but all the chocolate chunks/chips sank to the bottom of the cheesecake, so rather than being suspended throughout the batter of the cheesecake, they were all lumped at the bottom along the crust. Any idea why this happened? I double checked and I followed the recipe and ingredients list exactly. Thanks!
I am sorry to hear on the chips sinking. Try coating the chips in a teaspoon of flour net time to see if that can help. It sounds like your batter is a bit wetter than what ours was.