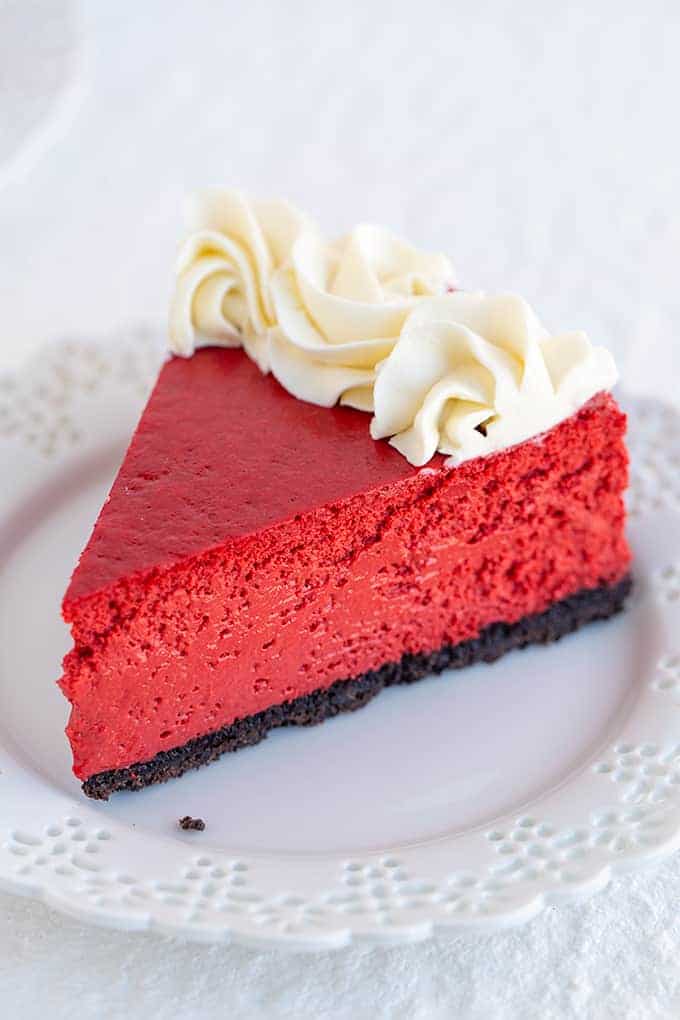
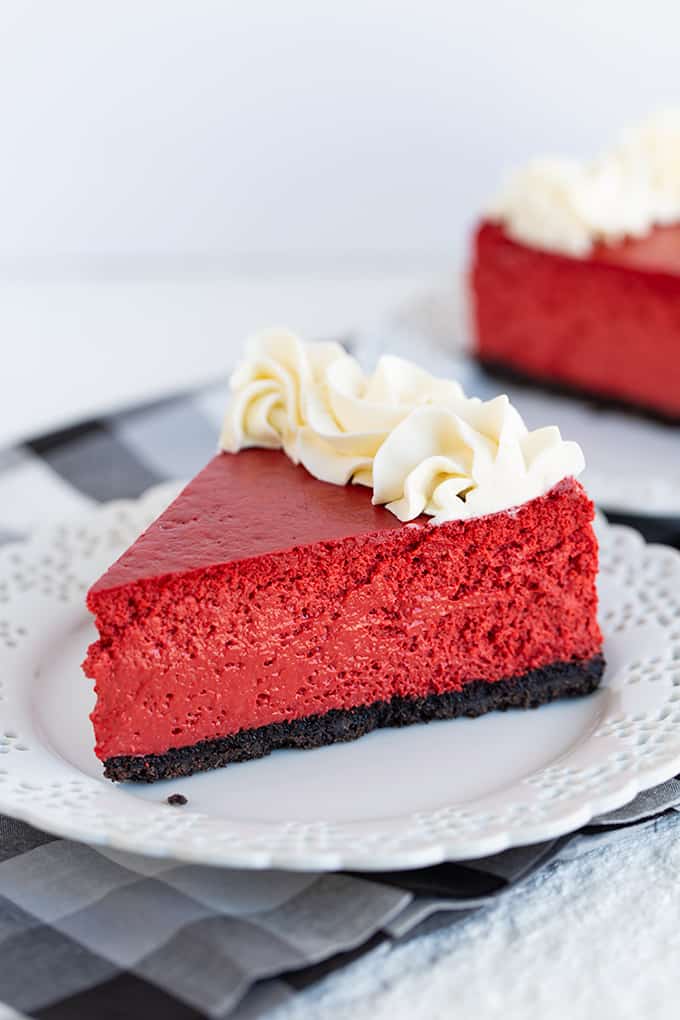
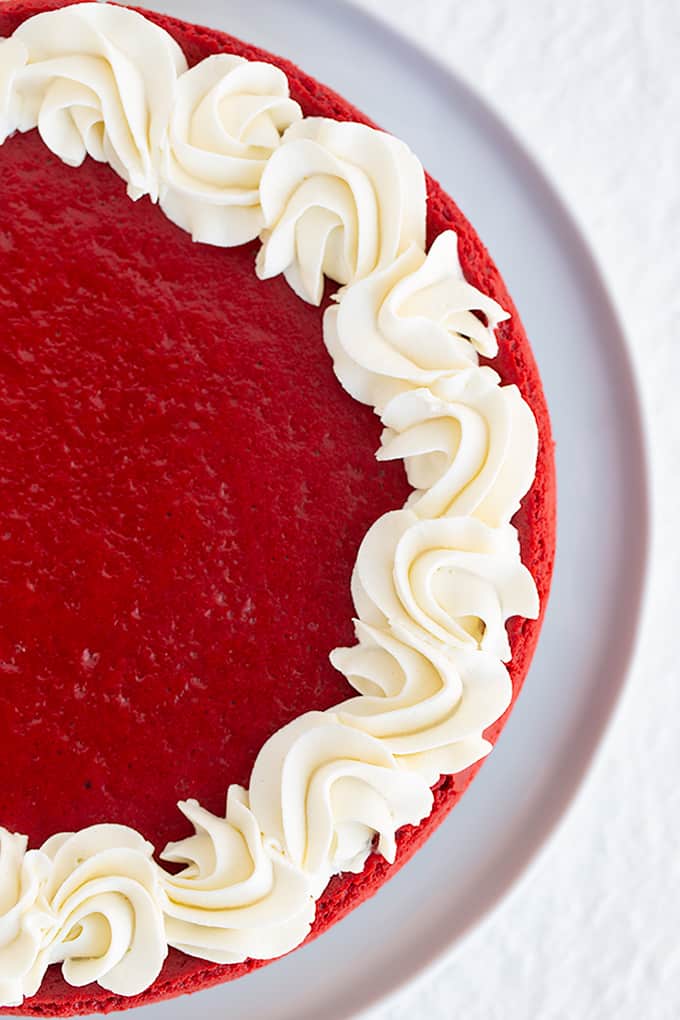
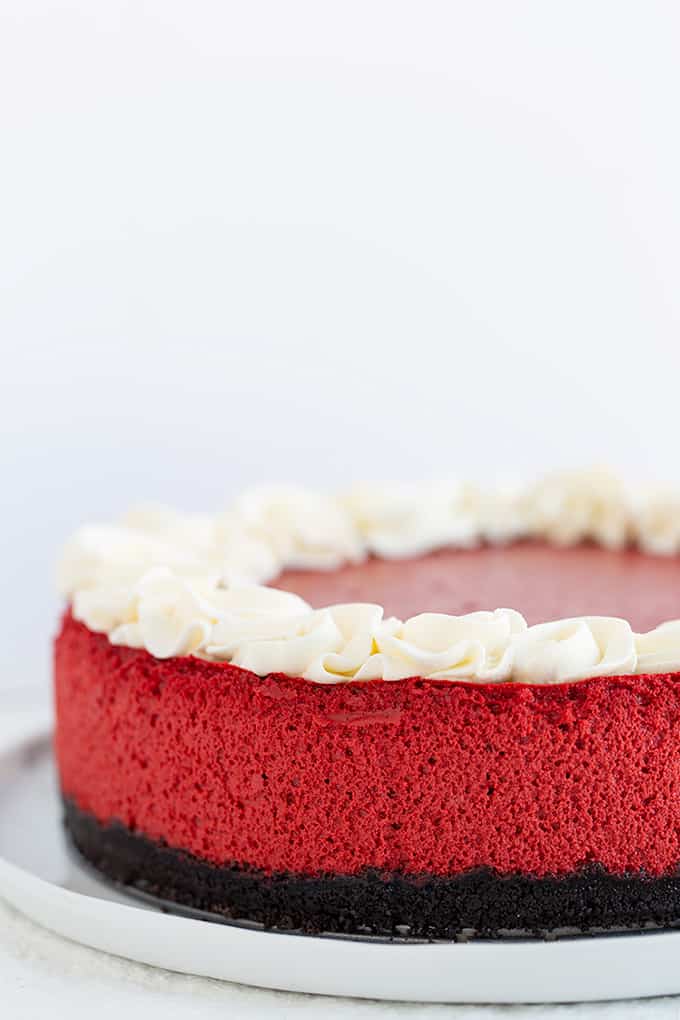
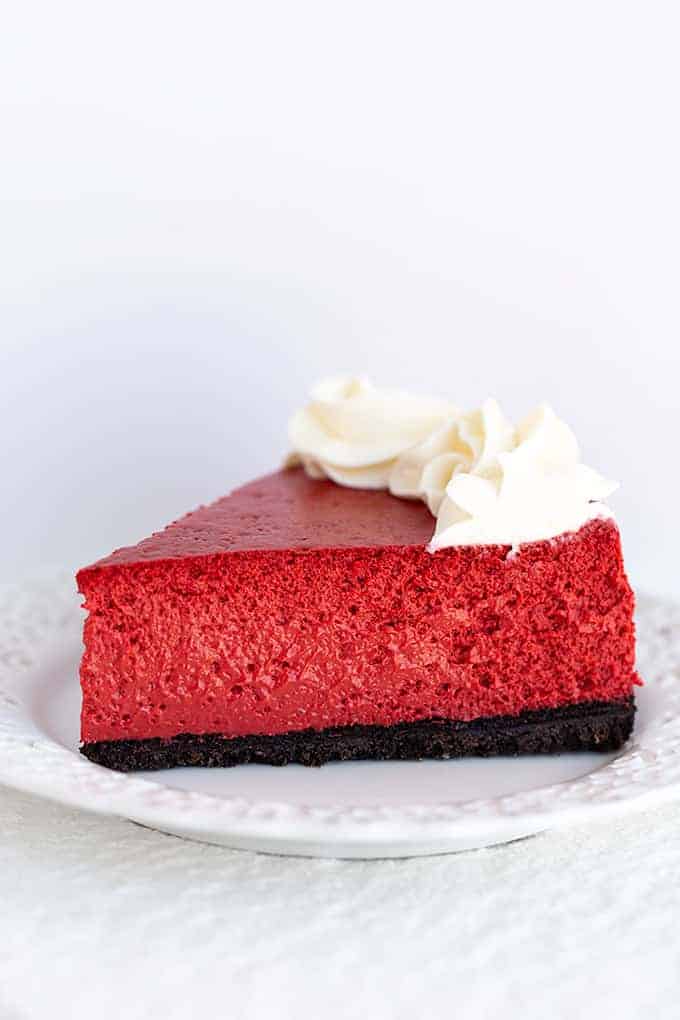
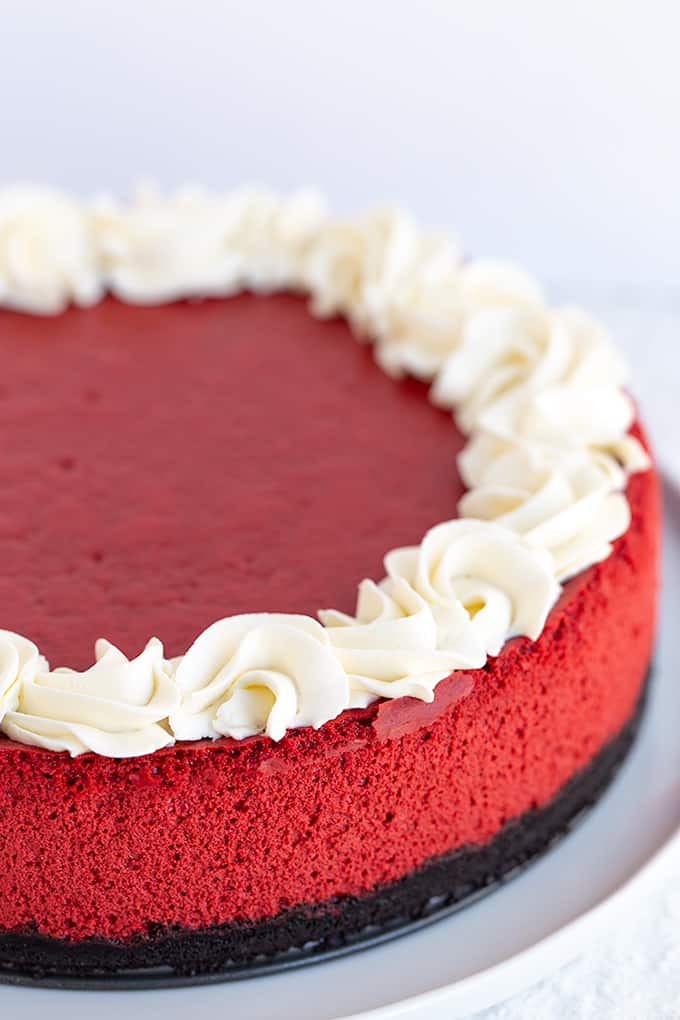
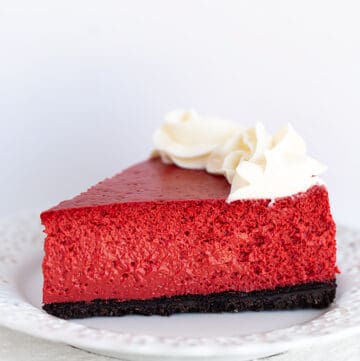
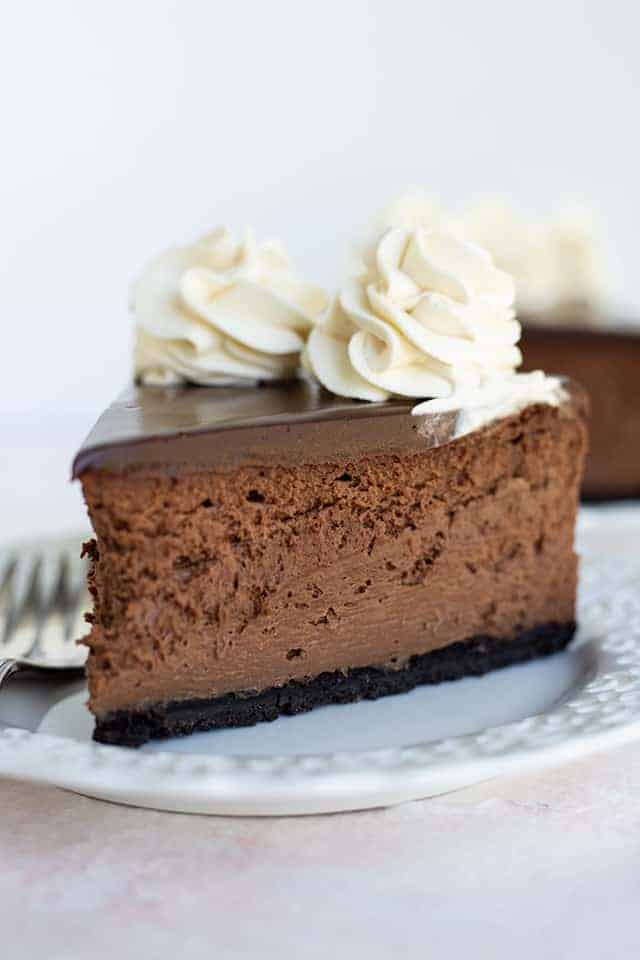
Red Velvet Cheesecake
This Red Velvet Cheesecake Recipe is the perfect combination of red velvet cake and cheesecake. It has a light chocolate flavor, a tang from the buttermilk, and oh so smooth and creamy. It's topped with a delicious cream cheese whipped cream and makes the perfect Valentine's Day dessert.
We love a good decadent dessert. Something that is over the top, delicious and where every bite tastes like heaven. That is exactly how I would describe this red velvet cheesecake recipe.
It is so delicious and so flavorful that you are going to want to make it all the time. Of course, it is the perfect dessert to make for Valentine’s day thanks to that gorgeous red color.
If you have a heart-shaped cheesecake pan, even better!
What is Red Velvet Cheesecake?
Red velvet cheesecake is a cheesecake that is made to taste like red velvet cake. There are a few ways that we infuse the red velvet flavor into the cheesecake. The first is by using cocoa powder. Red velvet is actually a mild chocolate flavor so cocoa powder is necessary! A little unsweetened cocoa powder adds just the right amount of smooth, chocolate taste.
The next way that we make this cheesecake into a red velvet cheesecake is by adding buttermilk. Red velvet always has a tangy, acidic flavor that is added in by mixing buttermilk into the batter. This red velvet cheesecake recipe has just a little buttermilk and also a touch of vinegar to make that acidic taste possible. Don’t worry, the cheesecake is still super sweet as well! The sweetness, chocolate and acidic combination is what makes red velvet such an amazing mix.
Discover what favorite pumpkin desserts should be at your Thanksgiving table this year
The last signature of red velvet is the cream cheese frosting. Almost every red velvet cake out there is topped with cream cheese frosting since it compliments the rich, smooth cake so well. We created a cream cheese whipped cream to top our cheesecake. The sweet and tangy whipped cream goes perfectly with the rich, red cheesecake. You are going to be obsessed!
How to Make Red Velvet Cheesecake From Scratch
Making red velvet cheesecake with oreo crust from scratch is not very hard. The key to a successful cheesecake is to mix the ingredients slowly and thoroughly. Do this, and you can’t go wrong! Here is how we make our red velvet cheesecake.
Oreo Crust: Start by making a simple oreo crust. Crushed oreos and melted butter are mixed together to make a perfect, chocolatey crust. Press it evenly into the cheesecake pan and place into the fridge or freezer to firm up.
Red Velvet Cheesecake: To make the batter, you start by beating the cream cheese, sugar, and cocoa powder together until smooth. Make sure there are no lumps of cream cheese before moving on to the next step.
Add the remaining wet ingredients, except the eggs, to the smooth cream cheese slowly, letting it really mix well as you add everything in. Add one egg at a time, scrape down the sides of the bowl and the continue. This will give you a super smooth red velvet cheesecake.
To bake the red velvet cheesecake, wrap the springform pan in foil to protect it from the water in the water bath. You don’t want any water leaking into your cheesecake! Baking the pan in a water bath helps the cheesecake cook slowly and evenly. Cheesecake can burn quickly if bakes too fast. Slower is better!
Cream Cheese Whipped Cream: While the cheesecake bakes, make the cream cheese whipped cream by whipping the cream cheese and heavy cream together until they form stiff peaks. Add the powdered sugar and vanilla to the mix. You can even add one drop of red food coloring to make a pretty pinkish whipped cream. It would be perfect for topping this cheesecake for Valentine’s day!
Can You Freeze Red Velvet Cheesecake?
Freezing red velvet cheesecake is a fantastic idea. You can bake the cheesecake completely, let it firm up in the fridge and then wrap it well. I would also recommend placing it in the freezer until frozen before wrapping it since cheesecake can be so delicate.
You want to be sure the cheesecake is fully wrapped to protect it from the drying air of the freezer. Use several layers of plastic wrap and then place the cheesecake in a gallon-sized zippered freezer bag for extra protection. The cheesecake will keep in the freezer for about 2 months.
When you are ready to eat it, place the cheesecake in the fridge to defrost. In about a day, it will be completely thawed and ready to ice and eat.
You will want to add the cream cheese frosting to the red velvet cheesecake after it has thawed. Whipped cream does not freeze well so be sure to do this step right before you are ready to eat the cheesecake.
It only takes a few minutes to make so you can still prepare the cheesecake in advance and have a perfect dessert ready to go.
How Long Does Red Velvet Cheesecake Last?
This red velvet cheesecake with oreo crust recipe will keep for about a week when stored in the fridge.
If you choose to wrap and freeze the cheesecake, it will last even longer- up to two months! However, the cheesecake will probably never stick around that long because it is too delicious to resist. It disappears quickly!
Give this recipe a try and be sure to put it on your list of Valentine's day desserts. It is guaranteed to make your “favorite dessert” list. It is beautiful, tasty, and completely decadent. A total dessert winner!
More Red Velvet Desserts
- Red Velvet Cupcakes
- Red Velvet Cake Mix Cinnamon Rolls
- Chewy Red Velvet Bars
- Red Velvet Hot Chocolate Cocktail
- Red Velvet Puppy Chow
Red Velvet Cheesecake
Ingredients
Crust
- 25 oreo cookies crushed
- 4 tablespoons butter melted
Cheesecake
- 24 ounces cream cheese room temperature
- 1 ¼ cups granulated sugar
- 3 tablespoons unsweetened cocoa powder
- 4 large eggs
- 1 teaspoon vanilla extract
- 1 cup full-fat sour cream
- ½ cup buttermilk
- 1 teaspoon vinegar
- 1 tablespoon red gel food color
Cream Cheese Whipped Cream
- 4 ounces cream cheese room temperature
- 1 cup heavy whipping cream
- ½ cup powdered sugar
- 1 teaspoon vanilla extract
Instructions
Crust
- Preheat the oven to 350 degrees F. Lightly spray the sides of a 9.5-inch springform pan with nonstick baking spray. Place a 3-inch wide parchment strip against the greased sides of the pan.
- Add the oreo cookies with the filling still in them in a food processor. Pulse until the cookies are all crumbs.
- Add in the melted butter and pulse until the butter has coated all of the crumbs.
- Pour the crust mixture into the bottom of the prepared springform pan. Firmly press the crust into the pan as evenly as possible.
- Place the crust in the freezer or fridge to firm up while preparing the cheesecake batter.
Cheesecake
- Add the cream cheese to a large mixing bowl. Using a hand mixer, beat the cream cheese on medium until smooth.
- Add in the sugar and cocoa powder. Continue to beat until incorporated.
- Add the vanilla extract and then the eggs one at a time. Beat in the eggs just until incorporated and scrape down the sides and bottom of the bowl before adding the next.
- Once all of the eggs are incorporated, add in the sour cream, buttermilk, vinegar, food color. Beat just until everything is incorporated. If the food coloring still has streaks after the buttermilk and heavy cream are incorporated, continue to stir with a spatula instead of a hand mixer.
- Before adding the cheesecake mixture to the pan, wrap the outside of the springform pan with 2 layers of heavy-duty tin foil. You can skip the tin foil and add the cheesecake in a slightly larger pan to keep the cheesecake dry and then place the two pans in a third pan that's filled with about 1 inch of hot water.
- Pour the batter on top of the cookie crust.
- Place the cheesecake in the preheated oven and bake for 1 hour 30 minutes to 1 hour 40 minutes or until the edges of the cheesecake are set and the center slightly jiggles like jello when the pan is jiggled back and forth. The cook time may vary so always give it the jiggle test and bake longer if the center moves like wet batter instead of jello that’s set up.
- Once done, leave the cheesecake in the oven, turn the oven off, and leave the door slightly ajar until the cheesecake has cooled to room temperature.
- Once cooled to room temperature, place in the refrigerator overnight to set up.
- Before serving, prepare the cream cheese whipped cream and pipe swirls on top of the cheesecake.
Cream Cheese Whipped Cream
- In a medium bowl, add in the cream cheese. Using a hand mixer, beat on medium speed until smooth.
- Add in the whipped cream and continue to beat until soft peaks form.
- Add in the powdered sugar and vanilla extract. Beat until stiff peaks form.
- Add the whipped cream to a piping bag fitted with a star tip and pipe the whipped cream on top of the cheesecake.
Nutrition
(Nutrition facts are an estimate and not guaranteed to be accurate. Please see a registered dietitian for special diet advice.)

I made this cheesecake for my husbands birthday and it turned out perfect!! Thanks for a great recipe that the whole family enjoyed!